3D models are a great tool to display and present your design. They are super versatile and let you experiment with textures, materials, and lighting!
For this exercise, we recommend using Adobe Dimensions. The software is quite intuitive and easy to use. Adobe Dimensions comes with Adobe's all apps subscription package, so it may already be available to you if you work in Photoshop.
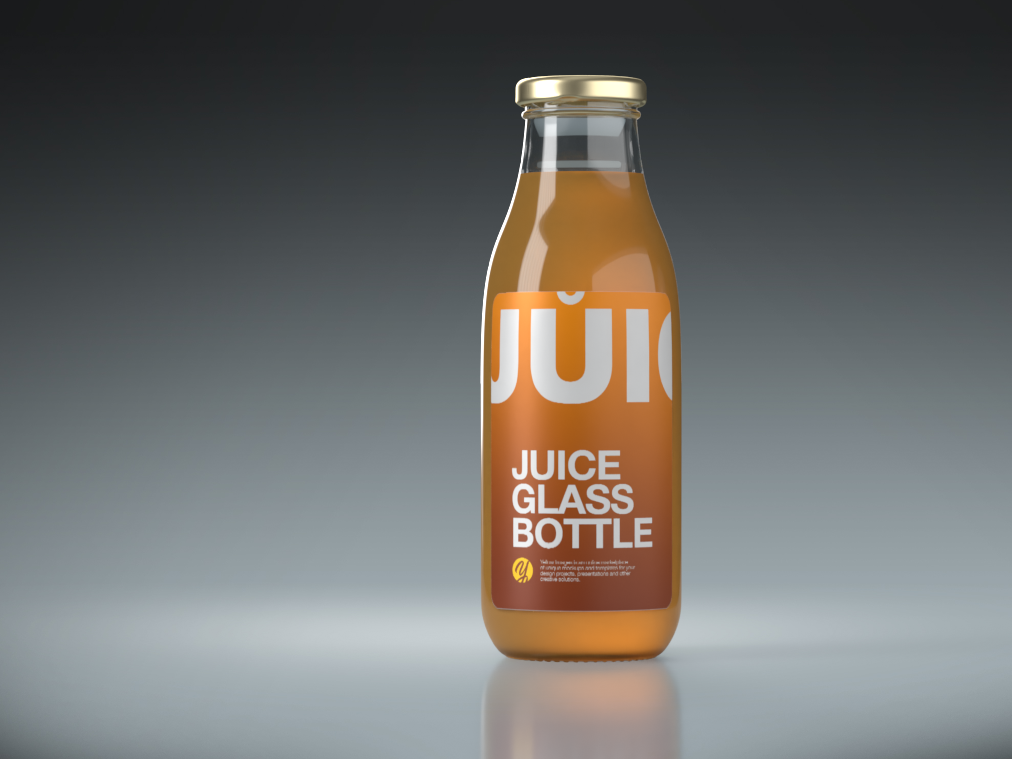
Follow these steps to apply your design to a 3D model. In this example, we will work with a 3D model of a Glass Bottle from our Object Mockups stock.
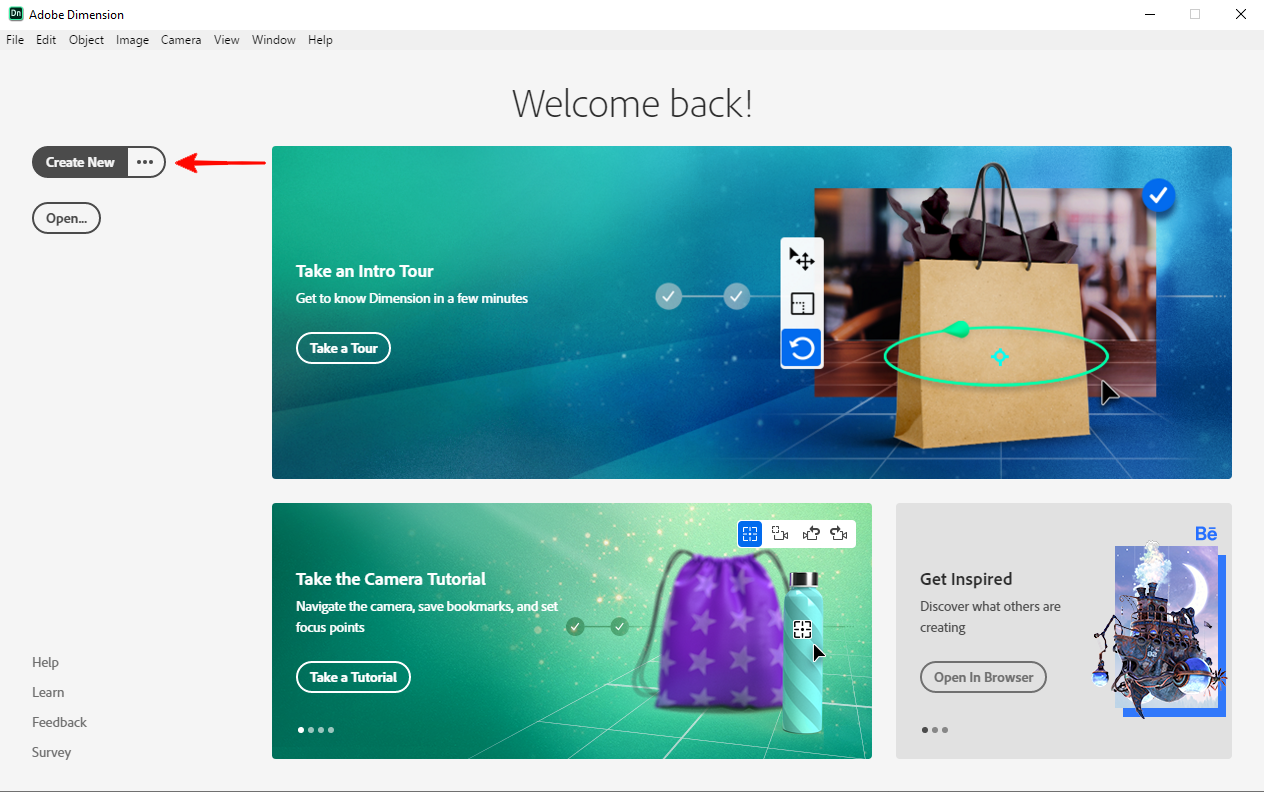
- Let's start with creating a new document in Adobe Dimensions:
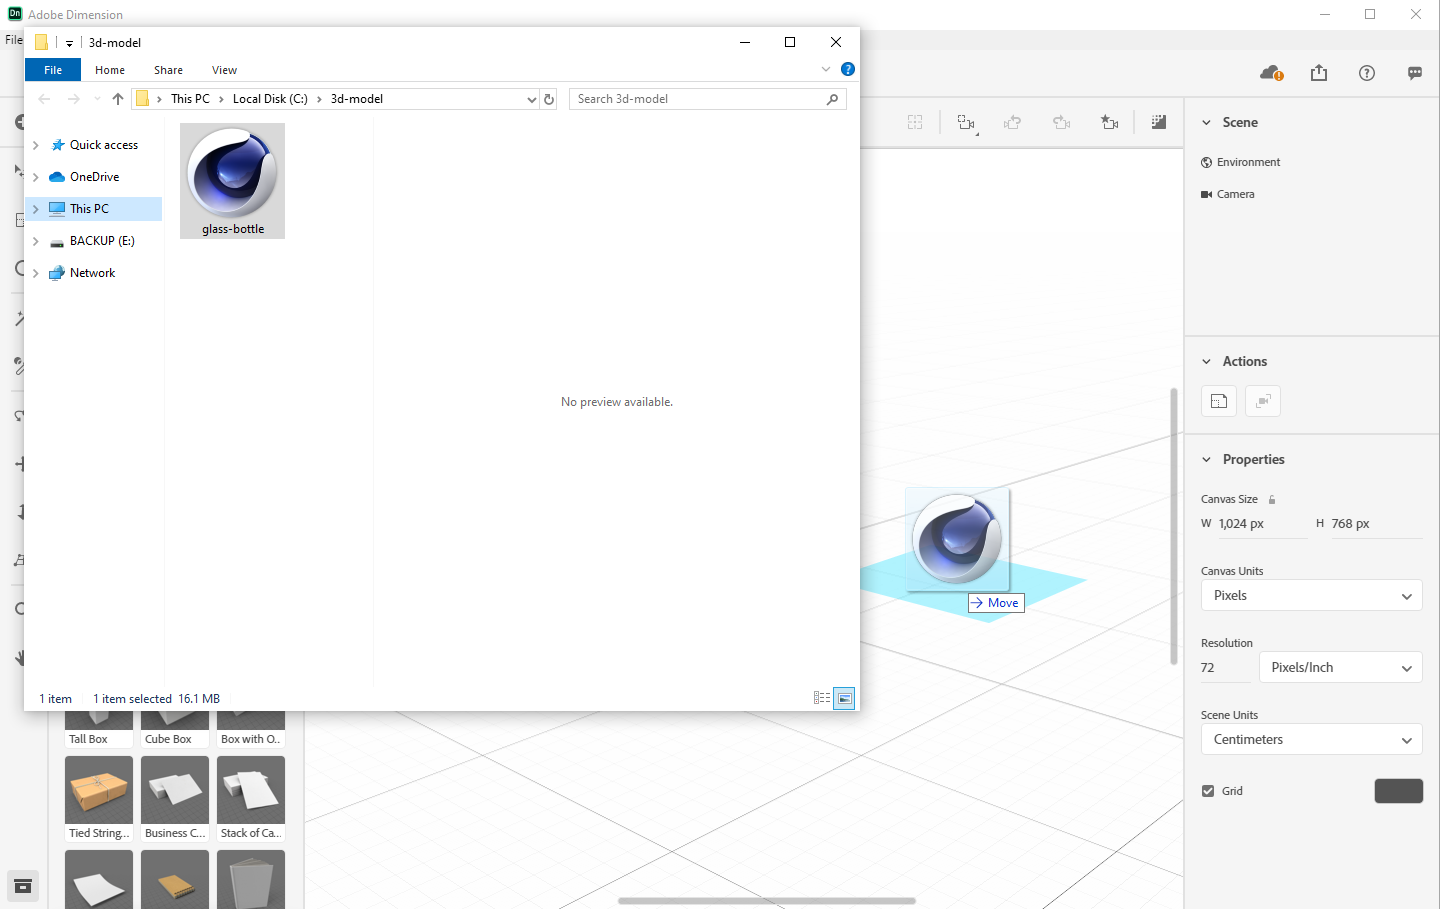
- Drag the 3D model from your folder to Adobe Dimensions window or ...
... import it through the File menu.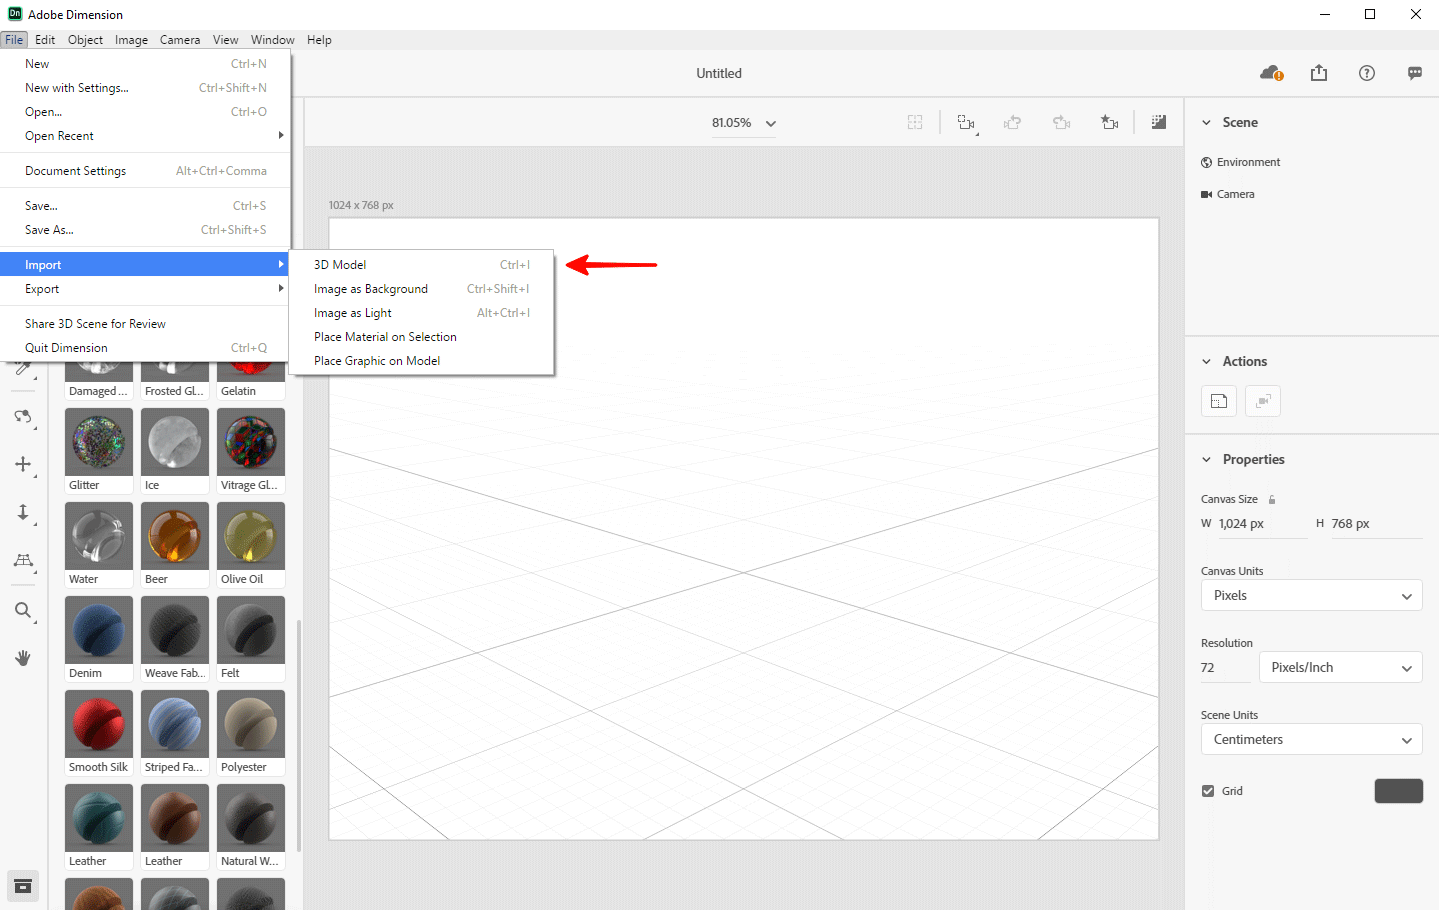
- Once imported, the 3D model might be automatically placed incorrectly on the ground surface.
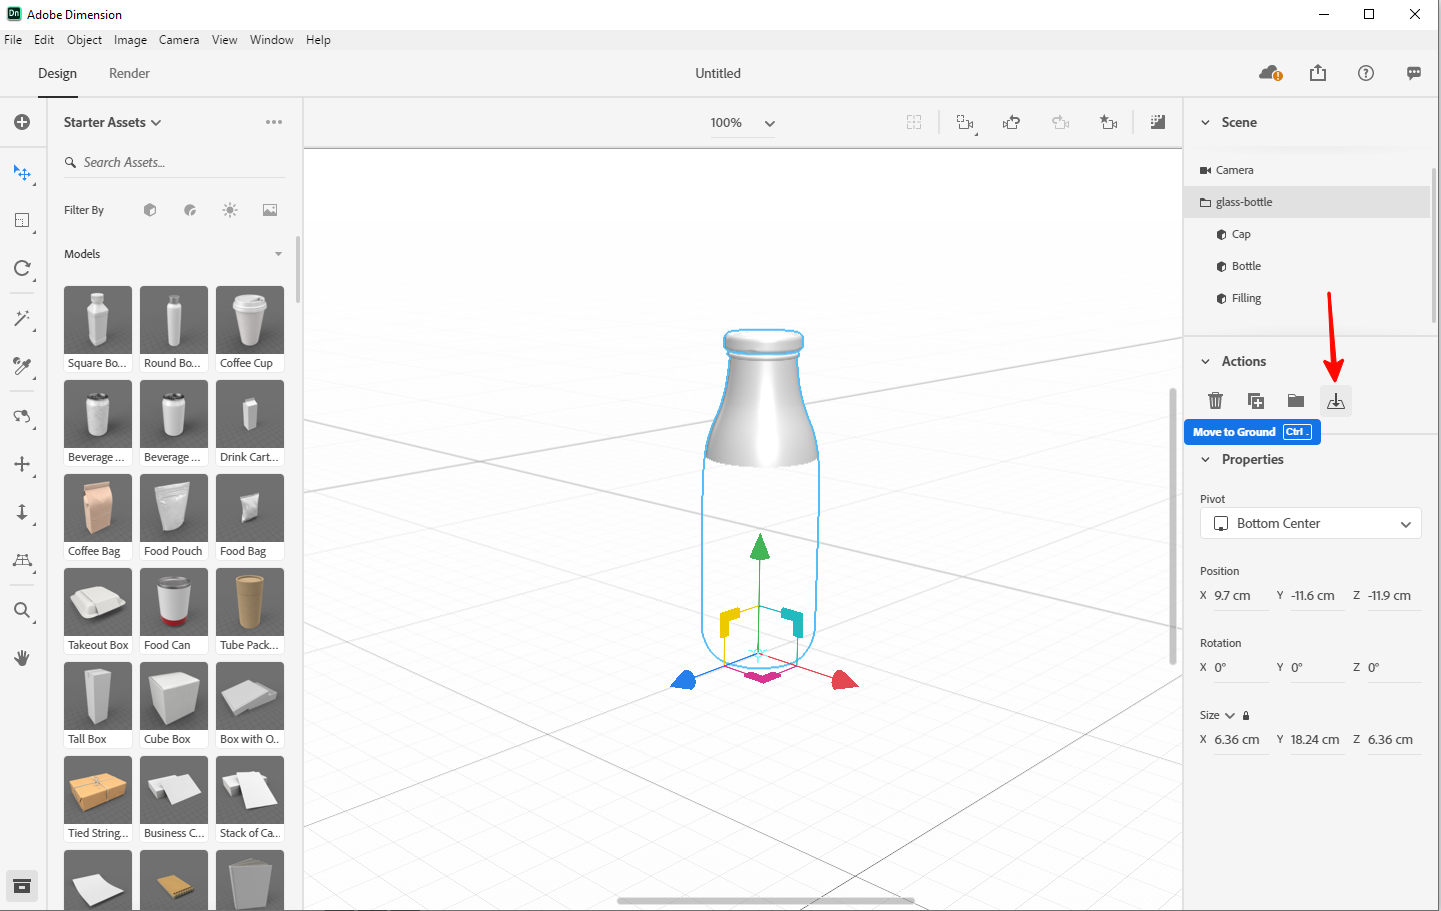
- To correctly place the model, click on it once and then press the Move to the ground button on the right side menu.
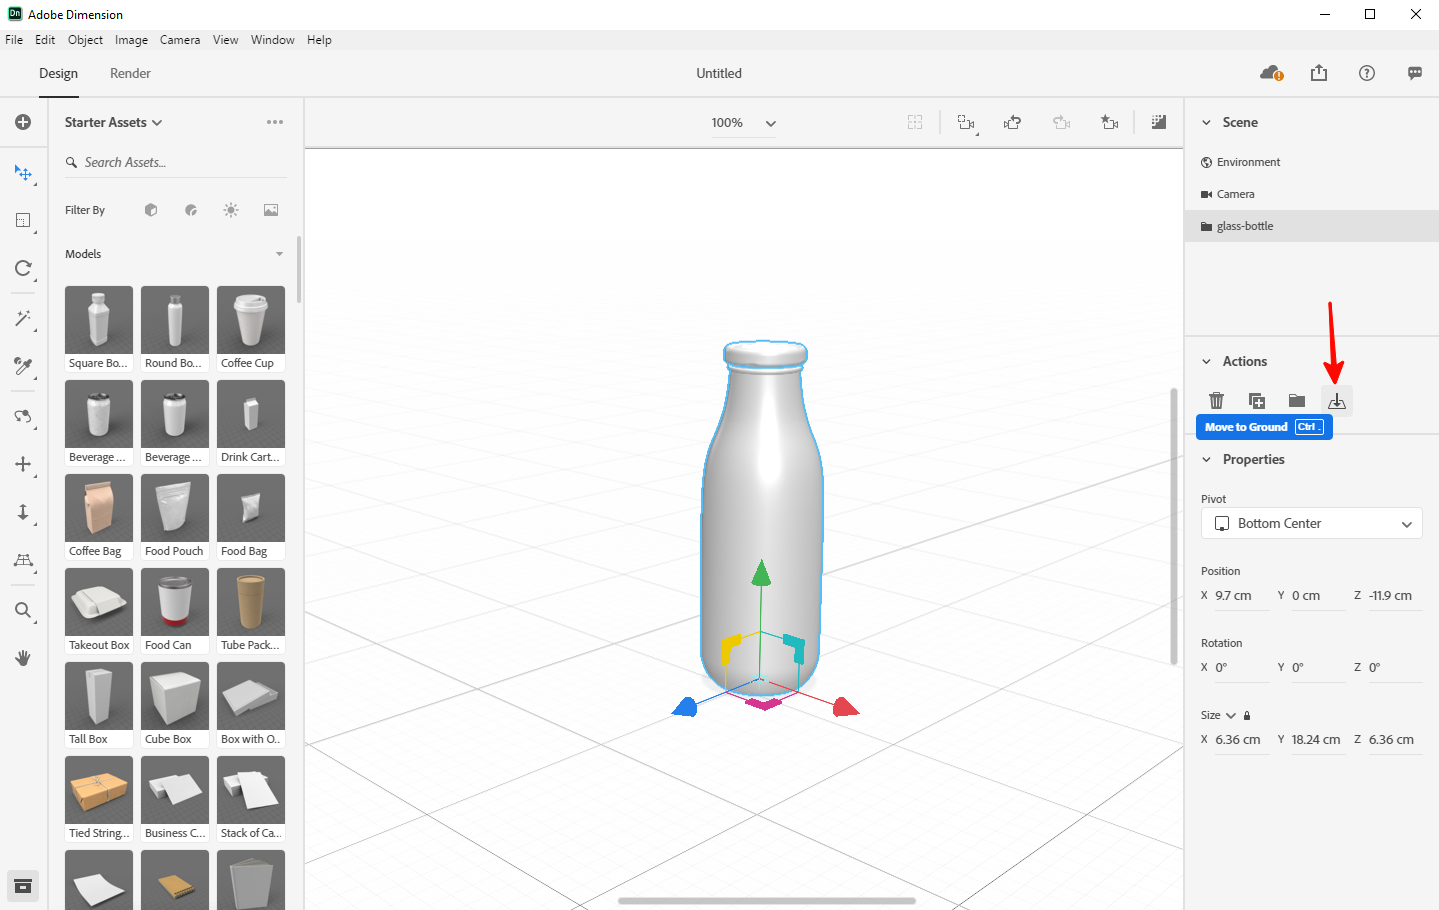
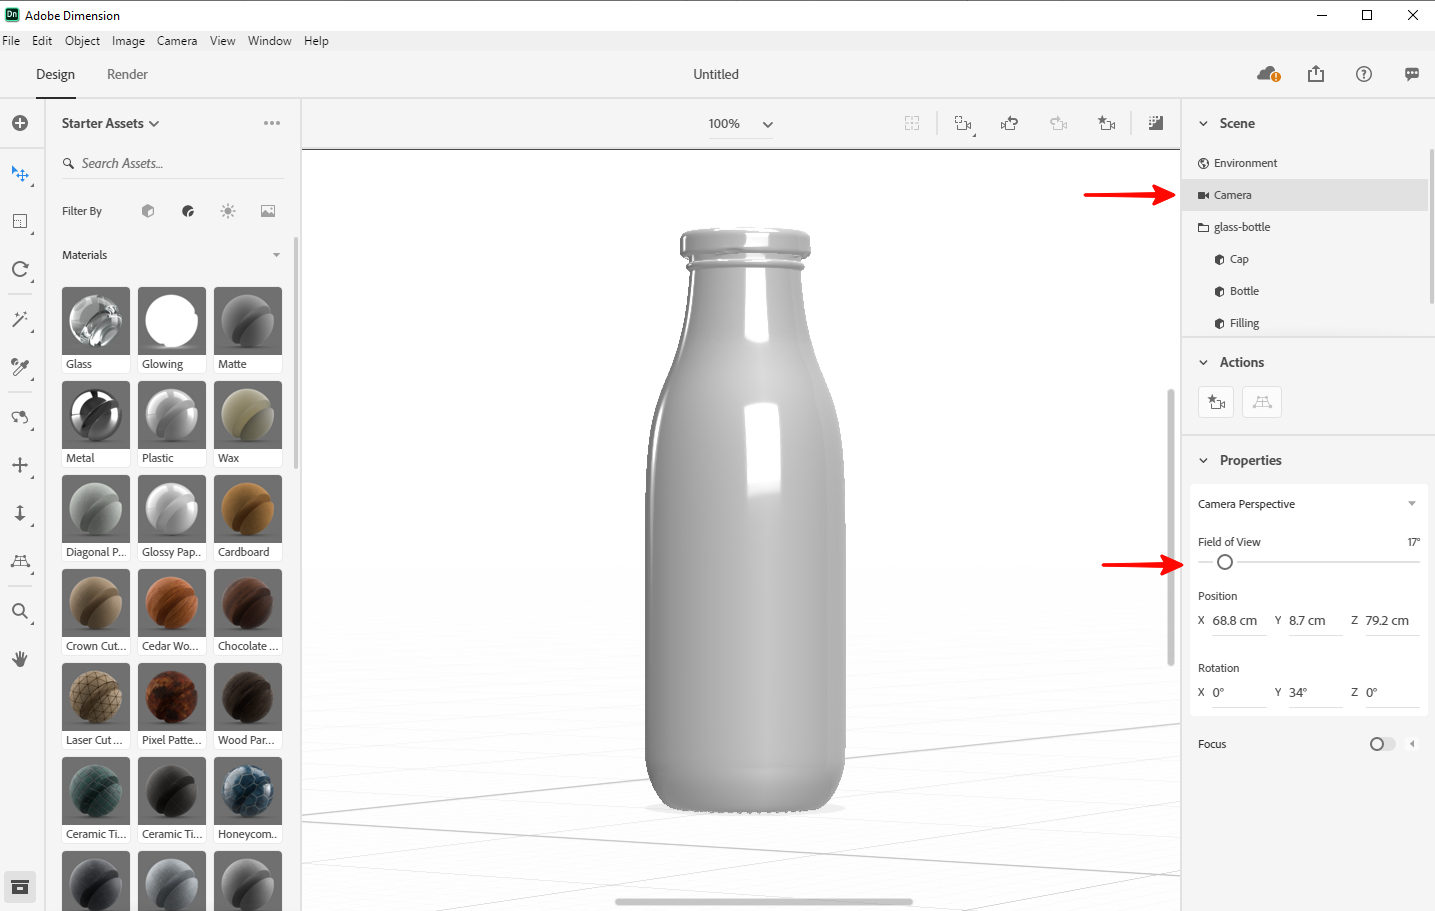
- Next, you need to configure the camera. Click on the Camera icon, and the camera settings will open on the right side panel. Set your model perspective using the Field of View slider.
- Let’s create the surrounding conditions for our model. Click on the Environment icon to open the settings menu. To change the lighting scheme, select the appropriate option from the left panel and drag and drop it to the scene window.
The environment settings will allow you to adjust the lighting intensity, locations of the light sources, and reflections of objects on the floor. In this menu, you can also set the sun as the light source and make other important environment adjustments.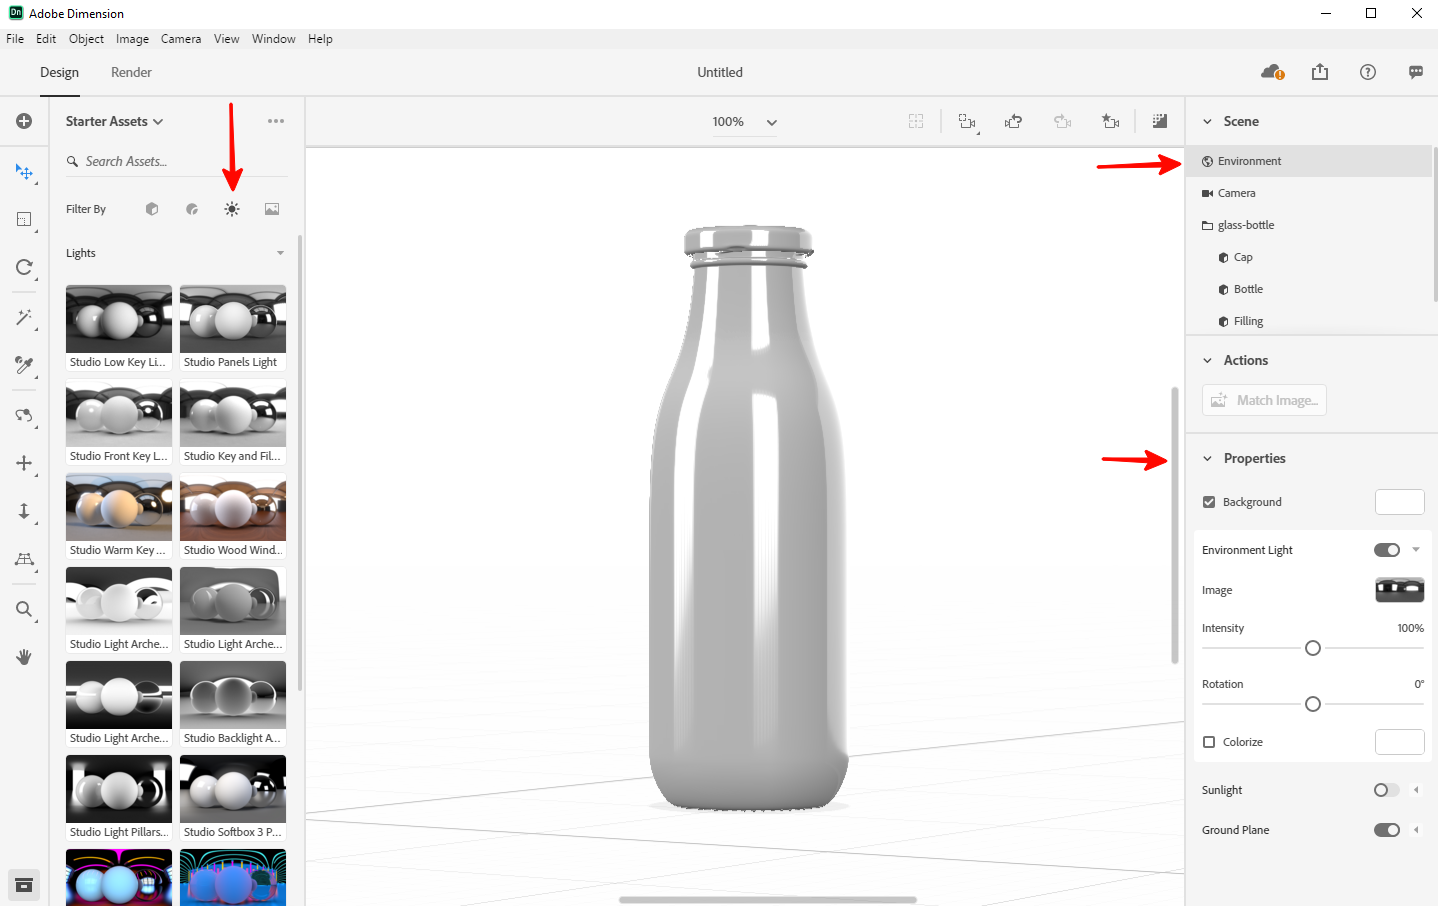
Here you can also add a background color or upload your own background image.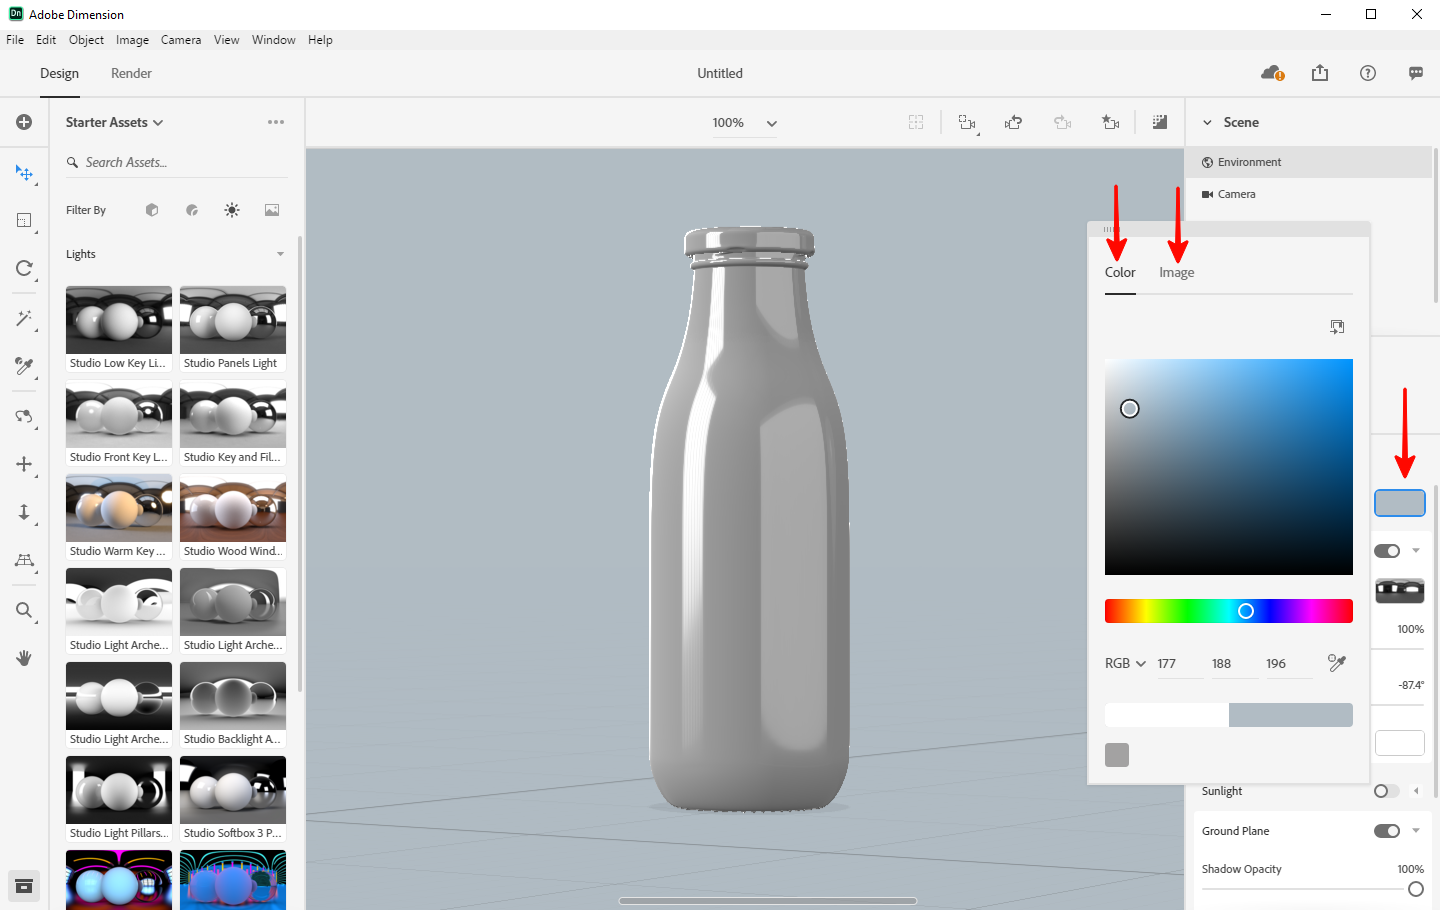
In this example, we set blueish grey as a background color.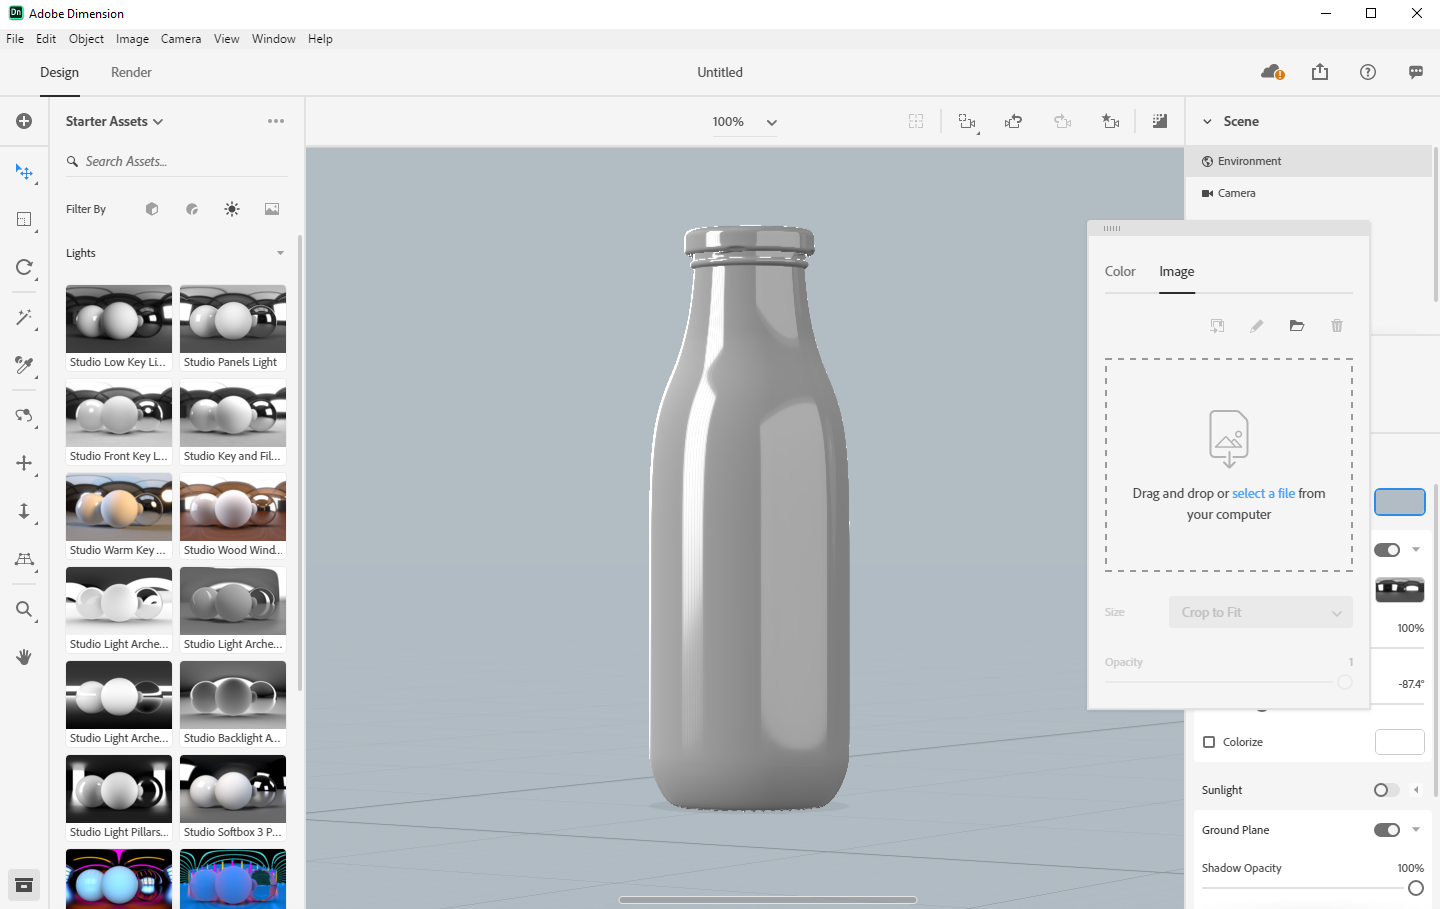
And here is the example with the background image.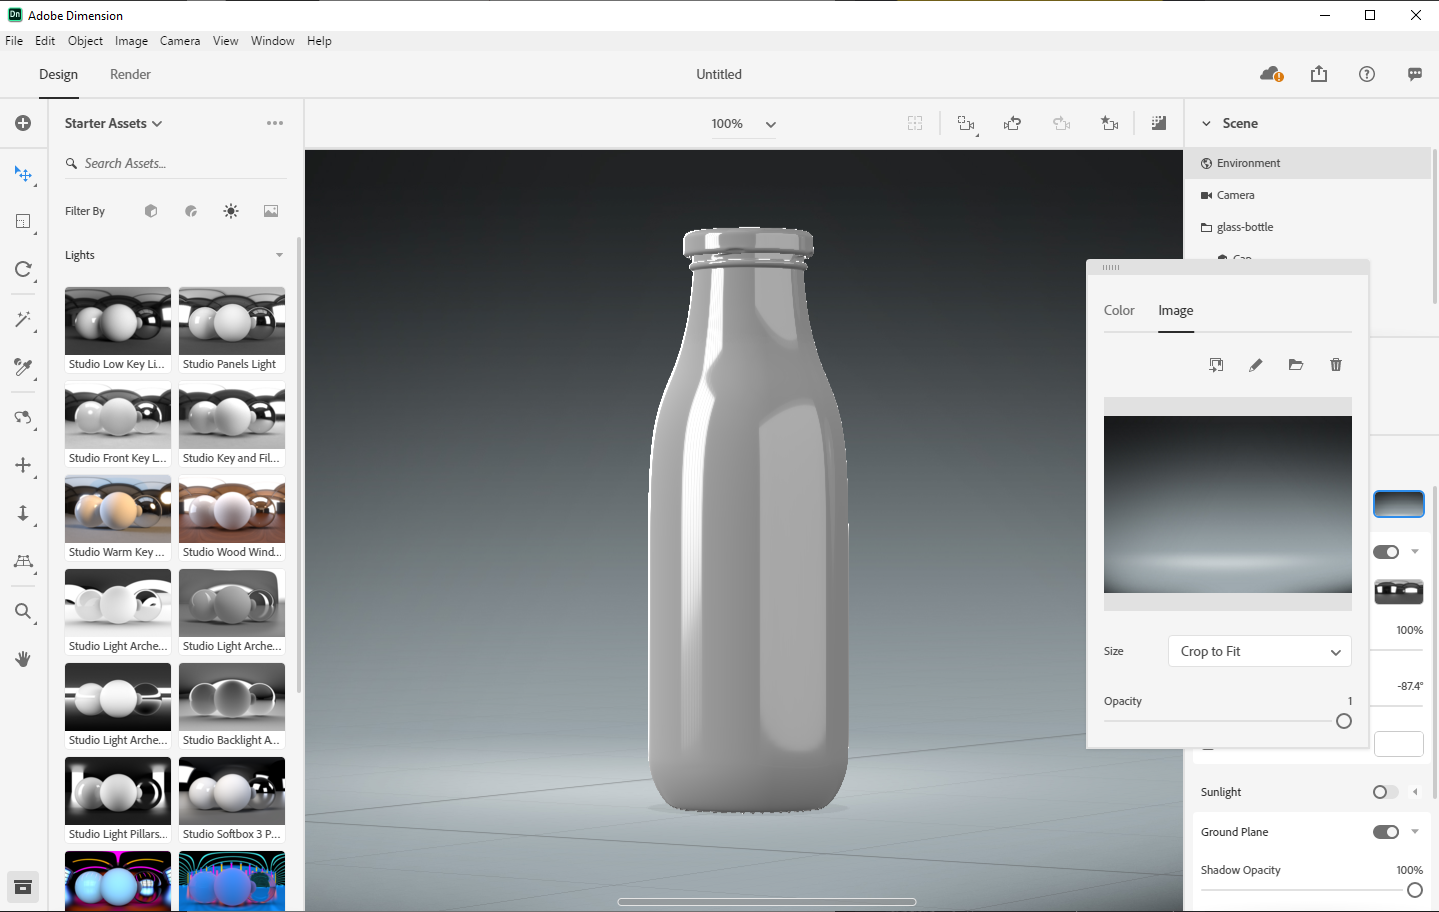
- For a more realistic result, you can apply materials to the model. There is a selection of standard materials, which is located on the left panel. In order to apply the material, select the material of your choice, then drag and drop it to the model. Here, we have applied Glass to the bottle.
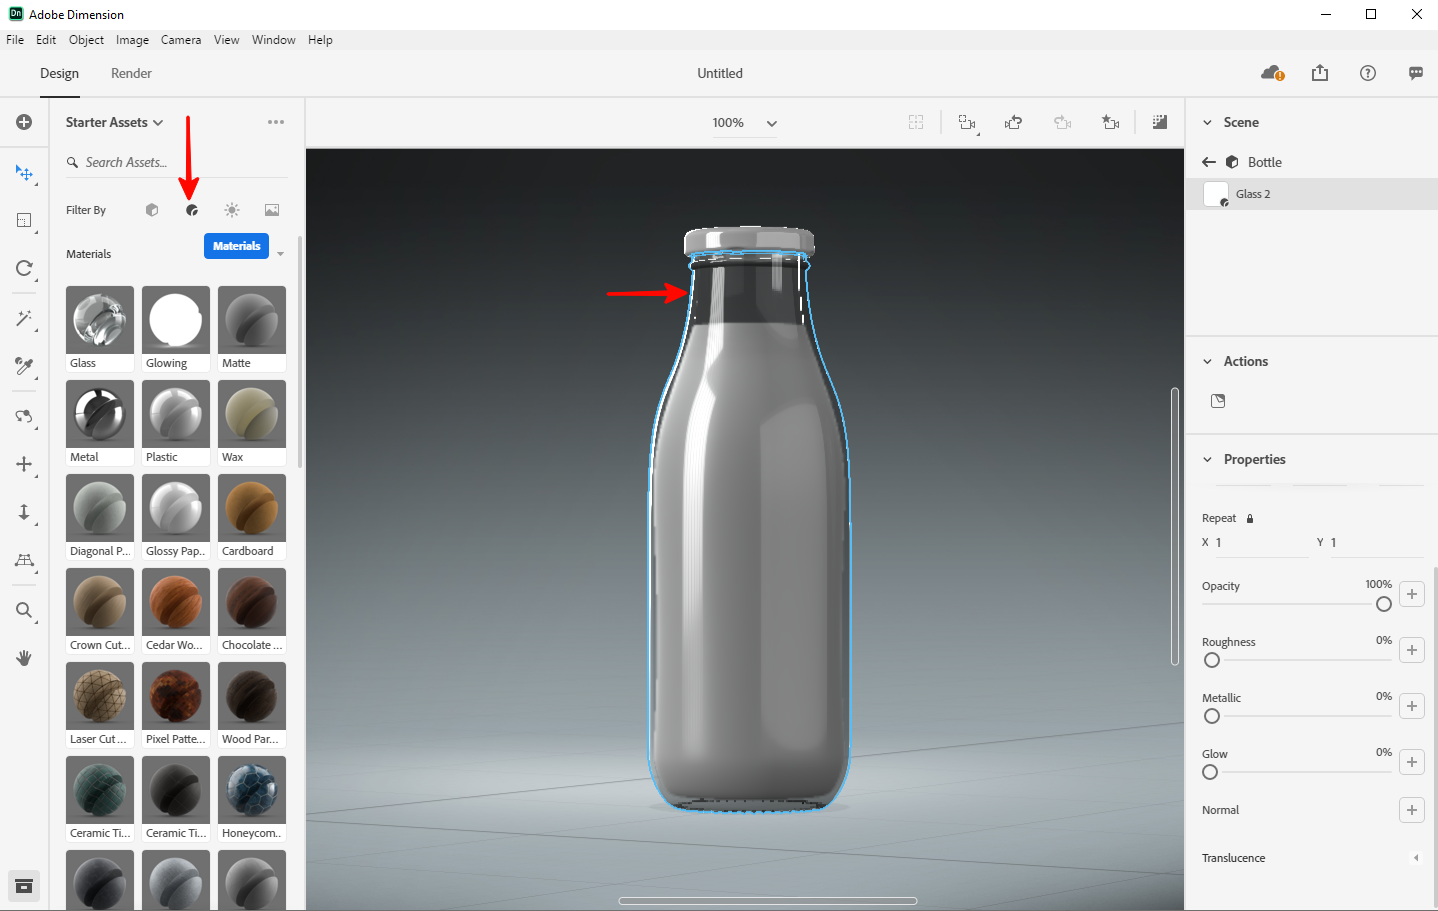
We also applied the material called Blinn to the bottle's lid. Once you apply a material, you will see the settings menu of that material appear on the right panel. You can use this menu to adjust the properties of the material.
In this example, we made the lid more matte.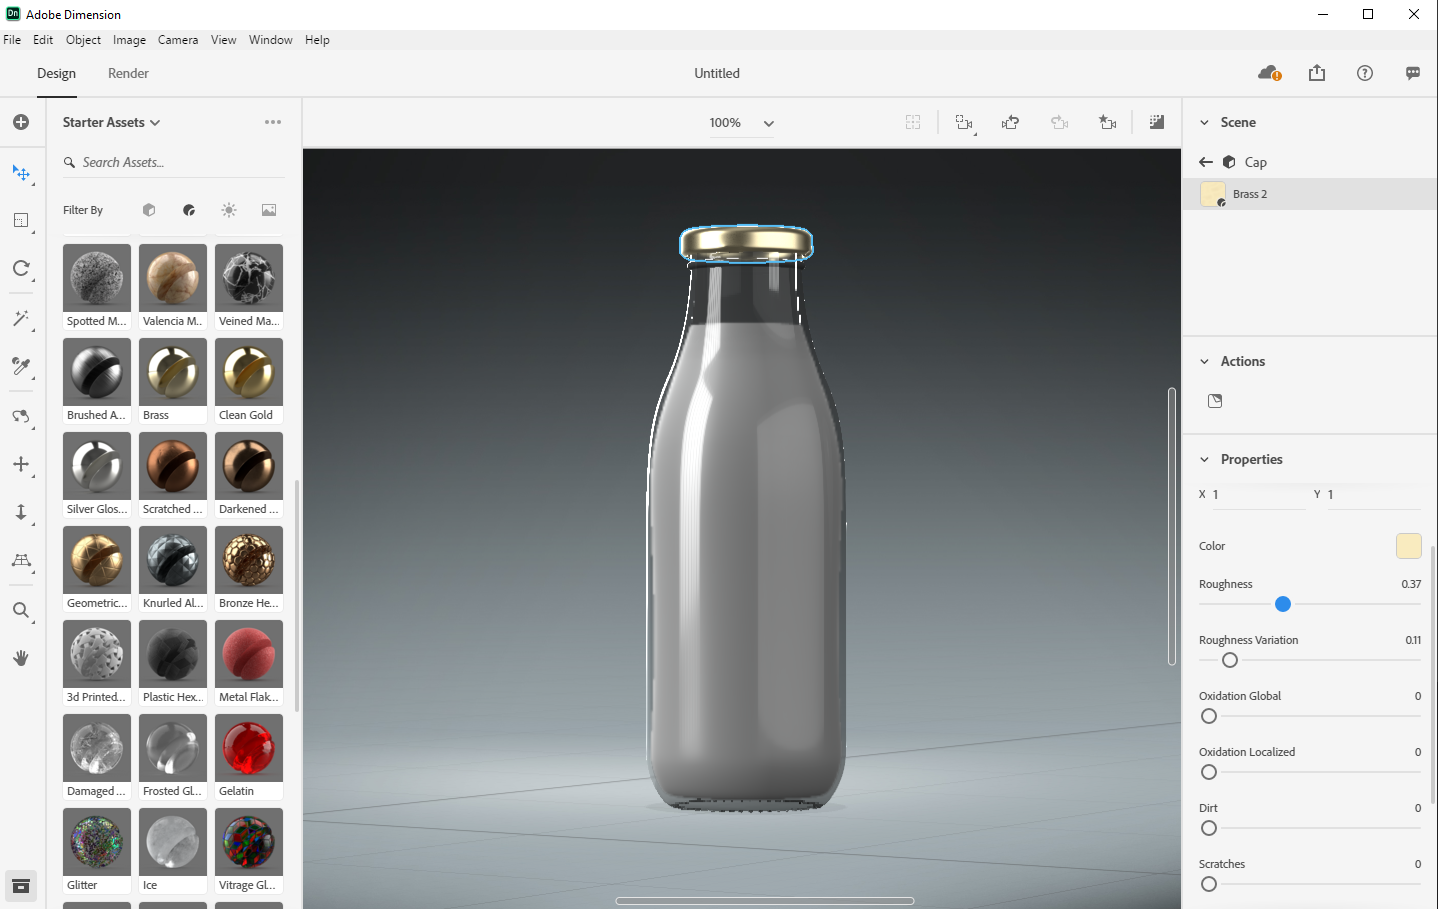
This 3D glass bottle contains another feature: a filling. Apply the filling material to it by moving the material from the left menu to the Filling icon on the right menu.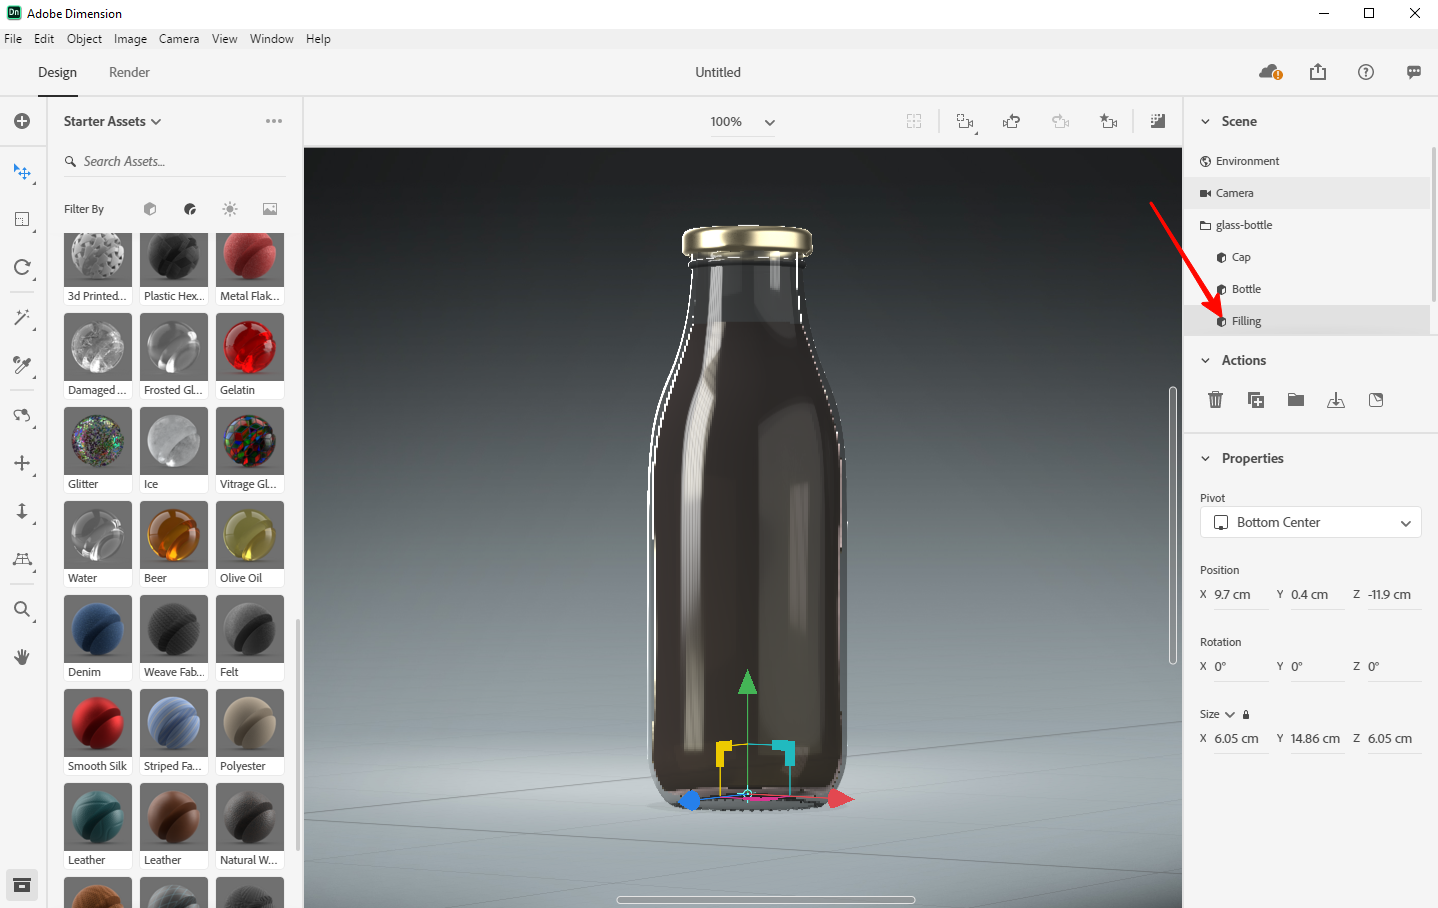
To edit the material, double-click on the cube next to the model name. Once you open the menu, you can make the material less transparent, change the color, and adjust the roughness.
To fine-tune the material, use the pre-render window (marked with an arrow). In this example below, you can see how the final material looks like.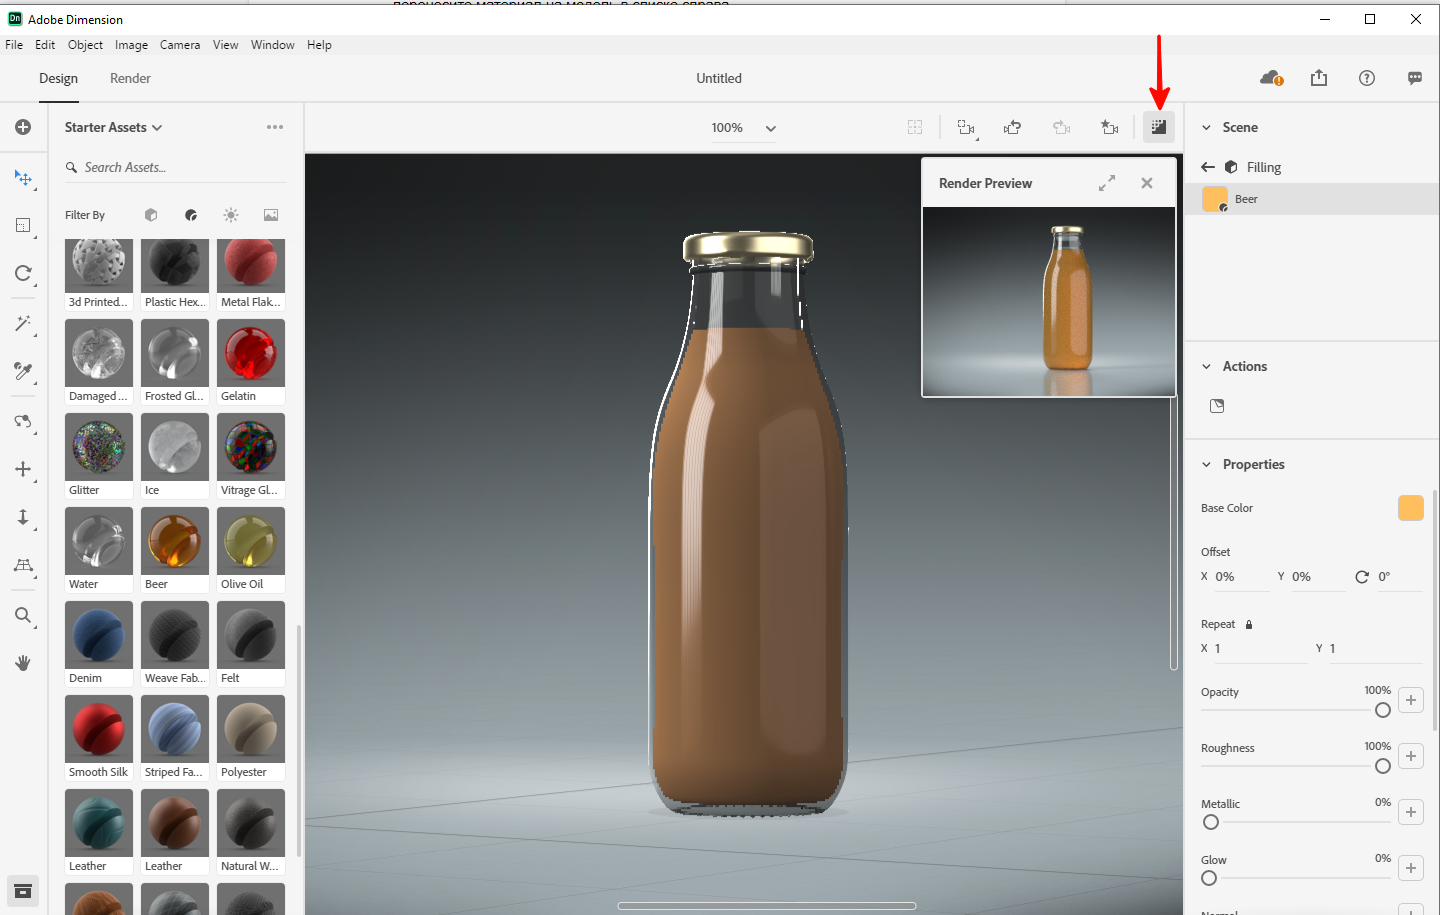
- Click on the model to select the label that you want to apply. Choose Place graphic on model once the settings of the model appear below on the right panel.
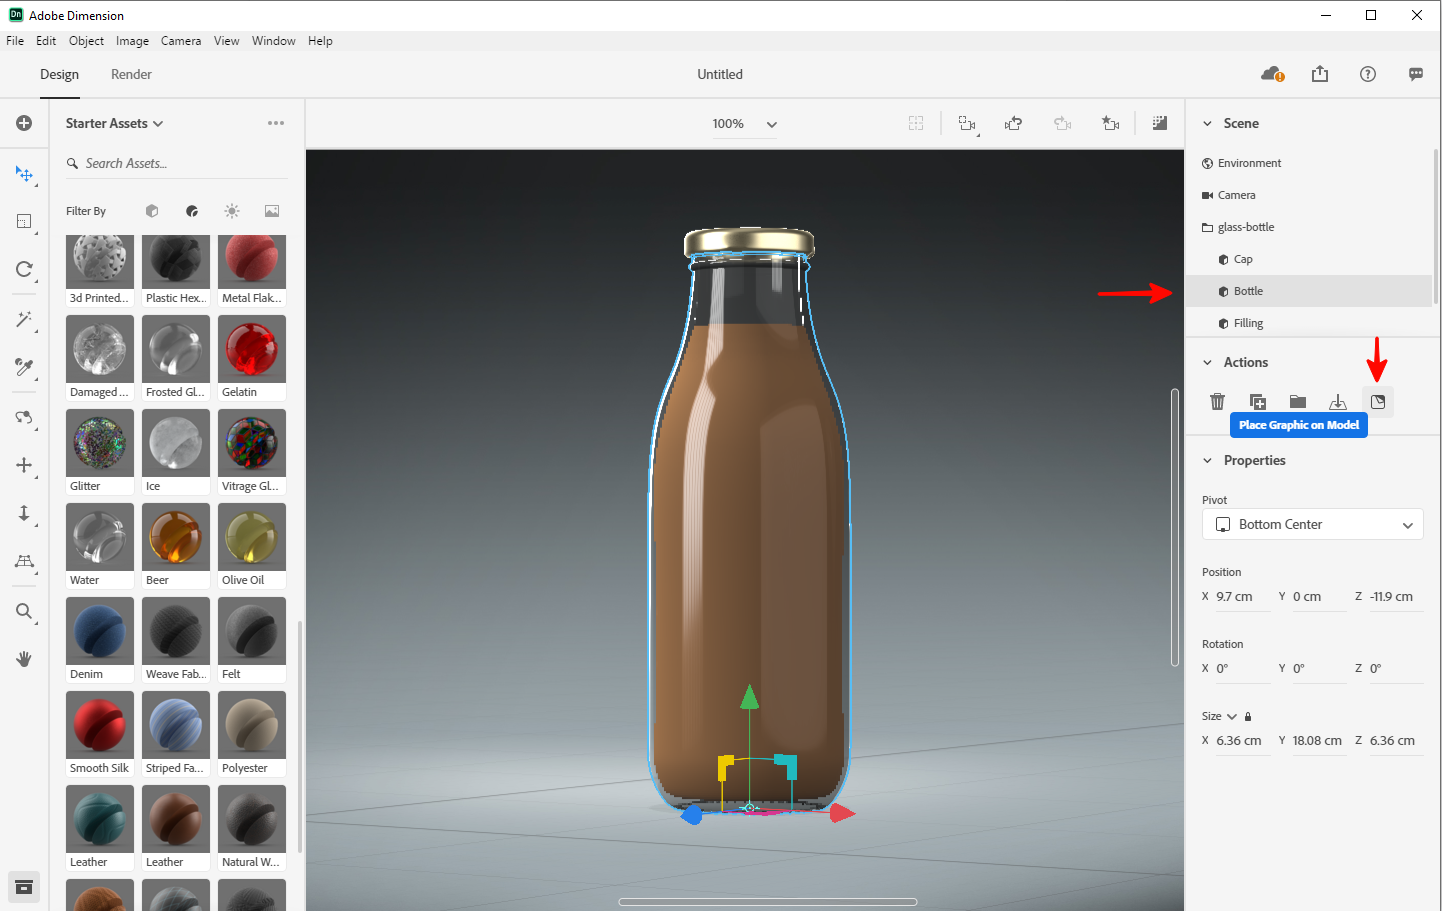
We have downloaded the selected image as a label (PNG file with rounded corners and transparency) as an example.
We keep the Blending Mode on Decal and adjust the label position using the controls in the viewport. In addition, we made the label more matte and added a bit of metallic shine with the Metallic slider.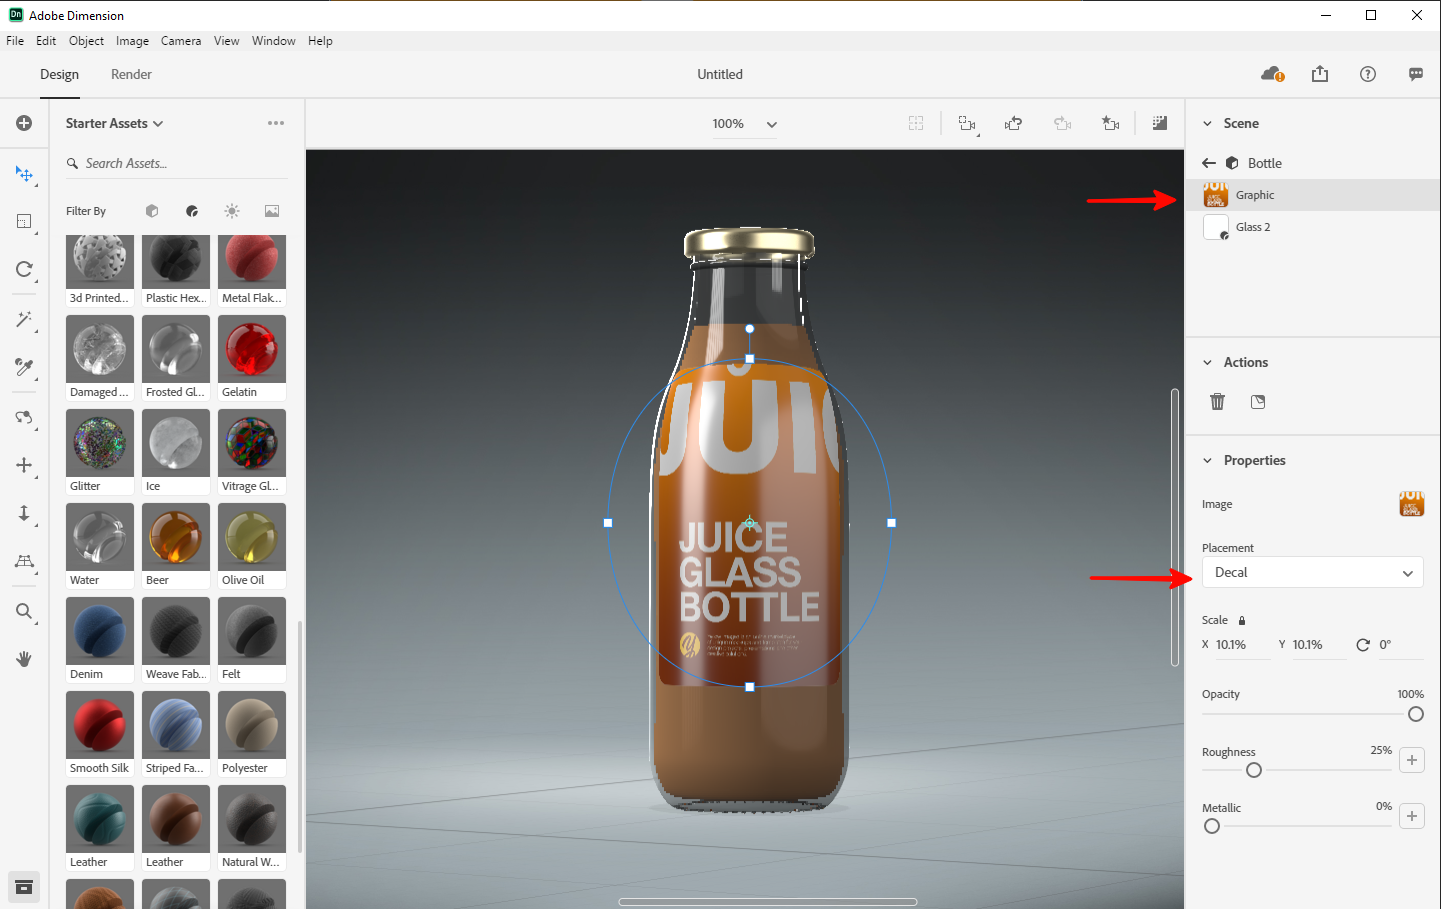
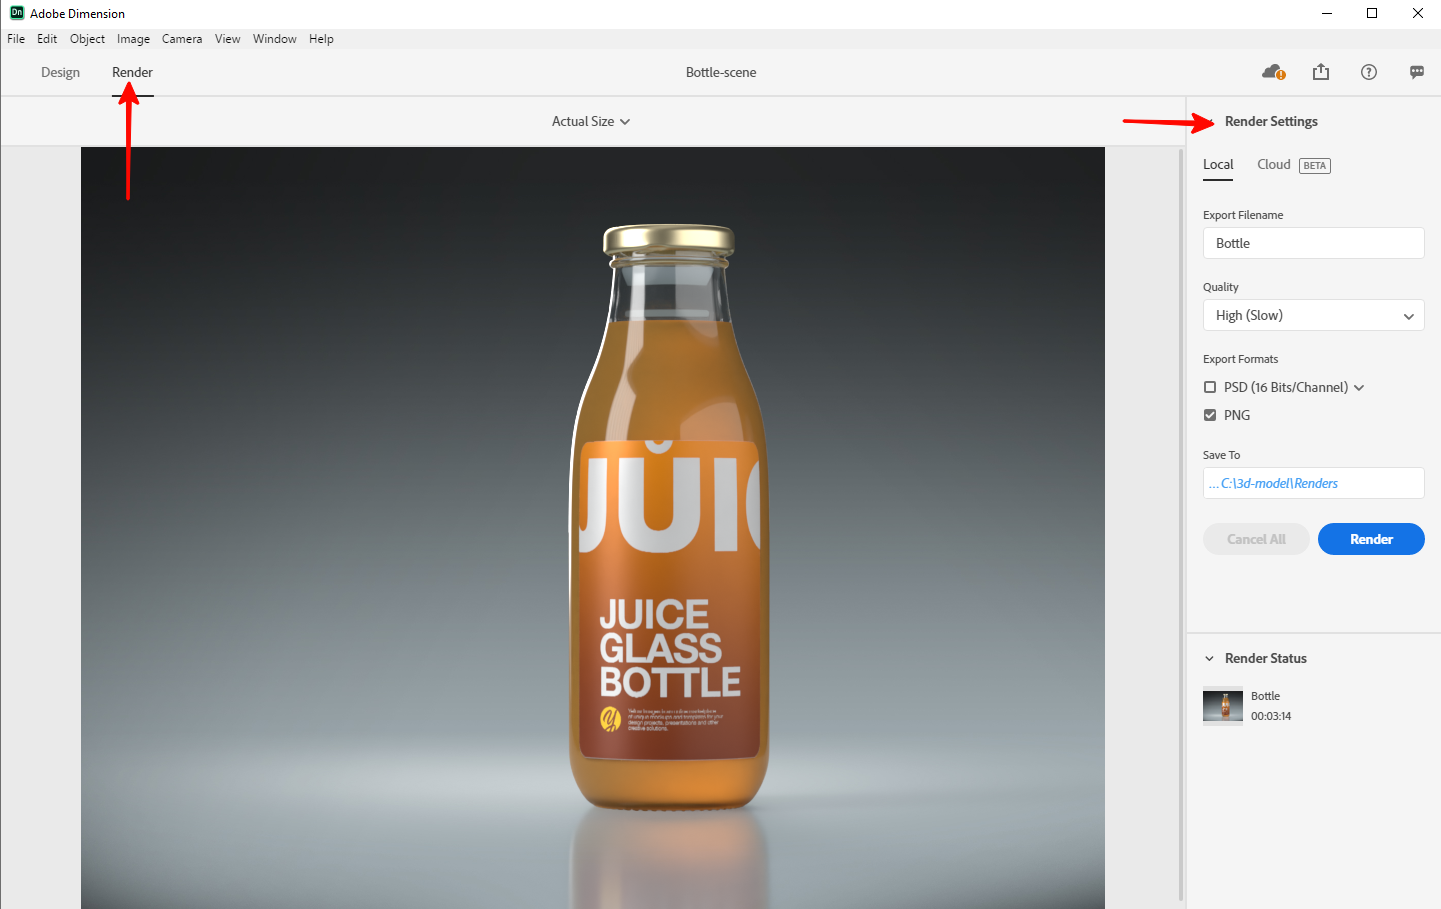
- Now you can render the image! Go to the Render tab, in the Render settings name your project, select the render quality and choose where to save the file. The higher the quality is, the slower the rendering is. Here, we have selected High (Slow) quality. Once rendering settings are done, click on the Render button and wait for rendering to complete.
Yay, we did it! What about you? If you still have any questions, please, don’t hesitate to get in touch with us and we'll try our best to help you!